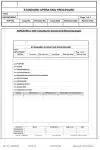
Learn how to write a standard SOP for operation of UV-Vis Spectrophotometer in the pharmaceutical laboratory.
1. PURPOSE
To describes the standard operating procedures for the operation and maintenance of the UV-Vis Spectrophotometer to ensure accurate and reliable analytical data for pharmaceutical tests.
2. SCOPE
This SOP is applicable for all personnel involved in the operation and maintenance of the UV-Vis Spectrophotometer in the pharmaceutical laboratory.
3. RESPONSIBILITIES
3.1 QC Executive/Analysts: Responsible for operating the UV-Vis Spectrophotometer according to the instructions provided. Perform routine maintenance and cleaning.
3.2 Quality Control Manager: Ensure all personnel are trained on this SOP and checked the operation and maintenance log book.
4. ACCOUNTABILITY
Head of the Quality Assurance Department
5. ASSOCIATED DOCUMENTS / REFERENCES
5.1 User Manual for UV-1800 Spectrophotometer
5.2 SOP for Good Laboratory Practices (GLP)
6. PRECAUTIONS
6.1 Rinse the cell with ethanol after wash.
6.2 After performing the test, clean-up of all used spare parts and its proper storage must be taken in careful consideration.
6.3 Handle all chemicals, including solvents, in accordance with Material Safety Data Sheets (MSDS).
6.4 Dispose of samples and solvents in accordance with laboratory safety protocols.
7. PROCEDURE
Instrument Model: Shimadzu UV-1800 Spectrophotometer
7.1 Switch ‘ON’ the power of Computer, Printer and spectrophotometer main body. Wait for about 15-30 minutes to warm up and initialization of the machine.
7.2 Double click on UV Prove 2.33 from startup menu, and then the monitor shows spectrophotometer screen and initialization starts automatically.
7.3 Wait till all the modules are initialized and are ready for next operation.
7.4 Press “F4” key of UV display to connect with the computer to activate the software.
7.5 For Qualitative Method (Identification)
7.5.1 Click “spectrum mode” for identification,
7.5.2 Then Click “Method” icon & set the following parameters:
Wave length: As required
Scan speed : Medium or Fast
Scan mode : set ‘’Auto’’
File name : As desired and next Click “OK”.
7.5.3 Click “Baseline” to check baseline. Baseline correction sets the background to zero over the currently selected wave length range and affects all subsequent readings within that range. This assures an accurate point of reference prior to acquiring data. The baseline check will start when the photometer status the window displays “Slewing.”
7.5.4 Set blank to the sample holder after checking baseline & keeps it there throughout the process before beginning the test procedure.
7.5.5 Set the standard to the sample holder next & Click “Start” to get the spectrum and its absorbance. After getting the spectrum click “OK” then click “Save” to save it & empty the standard cell and clean it properly.
7.5.6 Click “Operation“ and then press “Peak Pick” to detect the maximum absorbance & corresponding wave length of the standard. Then click “Point Peak” and put this information to the standard table.
7.5.7 Click “Report” and followed by “File”, “Open”, “Point Pick Report” and then “Open”.
7.5.8 Print the standard spectrum report by click on “Print” icon.
7.5.9 Set the sample to the sample holder next and follows the above procedure sequentially.
7.5.10 Put out both the cells after completion of the test and cleans all the used spare parts properly.
7.5.11 Sign the Log Book after completion of the test.
7.6 For Quantitative Method (Dissolution/Assay)
7.6.1 Follow 7.1.1 – 7.1.4 step as described above. Click “Photometric mode.
7.6.2 Click “Method” icon & set the following parameters:
Wave length: As required by the compendia and click “Add” button then click “Next”
Type: Select “Multipoint”
WL1: Again recognize the desired wave length.
Unit: As required
Click “Next” button three times
File name: As required, next Click “Open” followed by “Finish” and “Close” button.
7.6.3 Click on “Auto zero” button to zero the instrument with sample holder empty.
7.6.4 Input sample ID and concentration in the Std. Table.
7.6.5 Put Std. Sample one by one to the sample holder, keeping the blank to another sample holder and press “Read Std.” button in each case to get reading. Notable matter is that in order to activate the “Read Std.” button first left Click inside the std. table. Here we get the corresponding absorbance concurrently and Calibration Curve.
7.6.6 Make free the sample holder and put in the Sample. Input only Sample ID in the sample table
and follow the above procedure to get sample reading. Here we get sample Conc. and corresponding absorbance.
7.6.7 Save the data, then open method and Click equation. Select Column name and Units, next click factors.
7.6.8 Select required Column name and add them and Click close. Next write the actual equation,
Add it and finally close the screen.
7.6.9 Next write std. concentration and potency to the sample table, Where we get the result automatically. Or getting average result Right Clicks on the screen, followed by “Operation”, “Statistical analysis”.
7.6.10 Next Click “Report” and followed by “File”, “Open”, “Photometric Report” and then “Open”.
7.6.11 Next select column name, column source, clicks Average, Add and then closes the screen.
7.6.12 Finally Print the report by click on “Print” icon.
7.6.13 Exit from software, shut down the computer, printer and UV- VIS Spectrophotometer
7.6.14 Sign the Log Book after completion of the test.
7.7 Calibration
7.7.1 Perform a calibration of the UV-1800 Spectrophotometer using a standard solution (e.g., Potassium Dichromate) at least once a day or when there is a significant change in measurements.
7.7.2 Follow the user manual for detailed calibration instructions specific to the instrument.
7.7.3 Record calibration results in the calibration log. Any deviation from acceptable limits should be addressed before proceeding with sample analysis.
7.8 Data Recording
7.8.1 Record the absorbance or transmittance data of the samples in the laboratory notebook or electronic data system.
7.8.2 Ensure that all data are linked to the batch/lot number and analysis date.
7.9 Maintenance and Cleaning
7.9.1 After every analysis, wipe the cuvette holder and surrounding areas with a lint-free cloth soaked in ethanol.
7.9.2 Ensure cuvettes are clean and free from scratches or damage. Replace cuvettes if necessary.
7.9.3 For Weekly Maintenance inspect the UV lamp and replace if the intensity drops or when the lamp has exceeded its lifespan.
7.9.4 Verify that the UV-Vis software is updated and running the latest version.
7.9.5 For monthly maintenance perform a full calibration check with known standards (e.g., Potassium Dichromate, Hexane).
7.9.6 Clean the exterior of the instrument with a soft, damp cloth and mild detergent, ensuring no liquid enters the instrument.
7.10 Troubleshooting
7.10.1 Problem: No Data Output
7.10.1.1 Ensure the sample is properly placed in the cuvette holder.
7.10.1.2 Check if the cuvette is clean and not scratched.
1.10.1.3 Confirm the wavelength and scan range settings.
1.10.1.4 Verify that the lamp is functioning properly.
7.10.2 Problem: Absorbance is Higher than Expected
1.10.2.1 Check for air bubbles in the sample or cuvette.
1.10.2.2 Ensure the blank solution has been correctly prepared and measured.
1.10.2.3 Ensure the sample is not contaminated.
7.10.3 Problem: Error Message on Display
7.10.3.1 Refer to the instrument manual for the error code.
7.10.3.2 Perform a system reset or consult the maintenance team for hardware issues.
7.11 Documentation and Records
7.11.1 Record all spectrophotometer data in the lab notebook or electronic system, ensuring proper traceability.
7.11.2 Maintain calibration records, including standard solutions used, and the calibration results.
7.11.3 Maintain a log of routine maintenance and any incidents of instrument malfunction or errors.
8. ABBREVIATIONS / DEFINITIONS
8.1 UV-visible Spectrophotometer: An ultraviolet-visible (UV-Vis) spectrophotometer used to measure absorbance and transmittance of samples in the ultraviolet and visible light regions.
8.2 SOP: Standard Operating Procedure
8.3 UV: Ultraviolet
8.4 QC: Quality Control
8.5 MSDS: Material Safety Data Sheets.
9. ANNEXES
9.1 Annex-1: Log Book for Operation of UV-Vis Spectrophotometer
10. Revision History
| Version | Date | Description of Change | Reviewed By | Approved By |
| 1.0 |
Read Also:
- SOP for Calibration of Karl Fischer Apparatus
- SOP for Calibration of UV-Vis Spectrophotometer
- SOP for Calibration of FTIR Apparatus

Abdus Sobhan Salim is professional experienced pharmacist in pharmaceuticals, author and founder of pharmabossbd.com, the first Bangladeshi pharmaceutical blogger since 2019.


